Donkey Car Initial Setup for Mac
By Mike Camara. Acknowledgement: Naveed Muhammad (PhD), Ardi Tampuu (PhD) and Leo Schoberwaltero (Ms).
DonkeyCar is a racing car, it is also an open-source software python library that enables you to build your self-driving scale car using artificial intelligence (AI).
The good news is that you don’t need to be an Elon Musk or a Machine learning (ML) expert to get it up and running.
The initial hardware setup felt overwhelming. Even though that I had previous knowledge using Raspberry Pis and Linux, and there is an abundance of documentation scattered around the web guiding the set-up of these cars, I confess that I initially struggled a bit in different stages.
So, if you are either a student from some school and they let you use the DonkeyCar to experiment and learn more about Machine Learning, or you are just an individual curious about self-driving cars and decided to purchase the DonkeyCar platform to get you kickstarted without reinventing the wheel, this article is for you.
In my case I was from the first group, I’m a student currently taking a masters degree in software engineering at the University of Tartu, and I took a course in Autonomous Vehicles Projects and they let me borrow one of their Donkey Cars.
I will document here all the detailed steps that you will need to take to get you up and running with the car. Besides, I will also dive into the DonkeyCar infrastructure, explain how it works and share all the resources that helped me along the way.
Hopefully, after reading this article, you will fail less and reduce or eliminate unnecessary frustration and get your car driving autonomously faster.
What is the DonkeyCar
DonkeyCar is both a software and a hardware.
First, the software is an open-source Python easy-to-use and well-documented library to create your self-driving 1/10th scale remote control (R/C) cars. You can use the software for free and build with your remote control car by adding some components such as a Raspberry Pi microcontroller.
Secondly, DonkeyCar sells optimised hardware, including the Raspberry Pi, camera, remote car chassis, battery and so on, it comes all pre-assembled, which makes it so much easier.
Finally, DonkeyCar is more than just hardware and software, it is a community and an open-source platform to get people interested in ML by providing an awesome real-life example of an application of AI - autonomous driving.
Brief history
Everything started in May 2016, when the Stanford engineer Adam Conway first met the software engineer William Roscoe in a Self Racing Cars fair in Northern California. They were both autonomous racing cars hobbyists, and they realised that there was no easy way to get ordinary people involved in the area because the process was much more complicated than it need to be. In an incredible plot twist, a few months later they bumped into each other again in a hackathon, and according to Adam, he was assembling his vehicle when Will approached himself to him again and asked if he could help — thus beginning the partnership that has led to the creation of the Donkey Self Racing Car.
According to Adam, it’s called Donkey because like real donkeys, the donkey car is a domesticated wild animal (read AI), they’re safe for kids, they occasionally don’t follow their master’s commands, so expectations are low.
How it works
Once the hardware and software are all set up correctly you will run a python script that will start the training mode, which in other words, activates the car to receive commands to drive it around.
The car is equipped with a camera and ideally, you would have set a lined track to capture images and steering angles and throttle associated with the camera images.
The car can be controlled with a computer connected to the internet accessing the web-app localhost server, or a PlayStation® (PS) controller, or an Android or iOS device with the DonkeyCar app. I’ve tried them all and I had the best driving experience using the PS3 controller.
The mobile web page even has a live video displaying a view of what the car sees and a virtual joystick.
The server records data every time that the joystick command is issued from the person driving the car, then uses the images recorded, steering angles and throttle to train a Keras/TensorFlow convolutional neural network (CNN) model.
Once you are done with training the CNN, a model is outputted and it can be loaded on the car to make it drive like you, but autonomously.
Setting up the vehicle
When you first get your box it will contain the assembled car, which consists of a remote control car chassis, an assembled Raspberry Pi, some type of battery and its charger.
It might also come with an SD memory card, if not you will need to buy one, in terms of memory cards you will need at least 16 GB, but I recommend taking as much memory as possible, for example, my university let me borrow a car that had a 16GB memory stick, and everything was tortuously slow to load because when you start to install libraries it will take its time. So I purchased a 128 ultra-fast memory stick for 40 Euros and I’m saving a lot of time now.
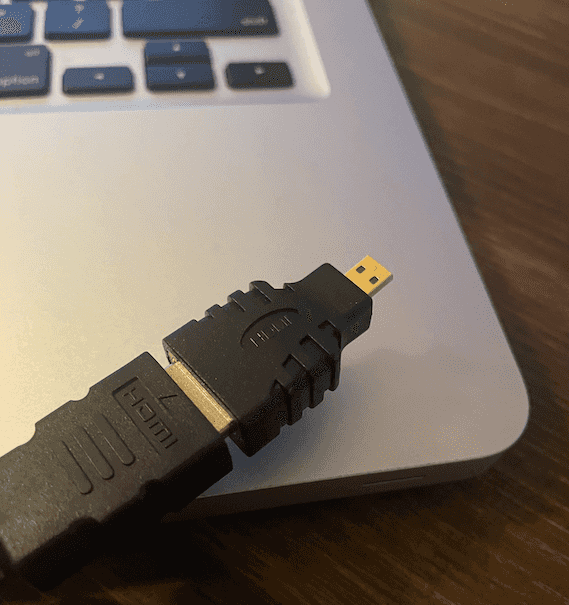
Although not needed, I would also recommend you to get a keyboard, an HDMI cable and a mini HDMI adaptor to plug your Car on a monitor, it will save a lot of time when you are setting up the SSH or if you need to find out the Raspberry Pi IP address.
So, once you have the SD card we can start with the installation of the software.
As a reference, I used the DonkeyCar docs website to initially guide me, but I will recreate the steps below. In my case, I have a Macbook so I will guide you through the steps to using your Macbook to set the DonkeyCar app.
The first is getting your computer ready for the DonkeyCar libraries.
Check if your computer already has Python installed, and which version of Python you have.
In your terminal type:
python --versionYou have to have at least the Python version 3.7 to make it work, but make sure you update to the latest version available. In my case, I have version 3.95.
Next, install Miniconda Python according to your Python version. Conda is an open-source package management system and environment management system that runs on Windows, macOS, and Linux. Miniconda is a free minimal installer for conda.
Make sure you have git installed, but usually it is already installed on macs from the factory.
Get the latest donkeycar from Github.
git clone https://github.com/autorope/donkeycarNavigate to the folder.
cd donkeycarYou are initially in a branch called dev, you will have to move to the master branch.
git checkout masterNow create the Python anaconda environment.
conda env create -f install/envs/mac.ymlThis will take a while because you are installing many packages, and if everything went alright you will see something like this in your terminal.
The next command is SO IMPORTANT, because you have to type it every time you close your terminal window to re-enable the mappings to donkey specific Python libraries.
conda activate donkeyAs soon as you type you will see the environment in your terminal changing from base to donkey.
You might come across the following error:
If so just enter the following commands
conda info --envsAnd then you can see the correct file location, which in my case was the following:
conda activate /opt/miniconda3/envs/donkeyNext command:
pip install -e .\[pc\]The last command to set up your computer is the following.
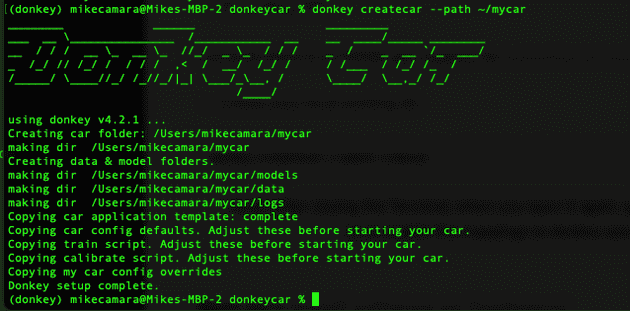
donkey createcar --path ~/mycarIf everything was successful so far then you would see something like this in your terminal window.
Now we will go ahead and install the software on the Donkeycar itself, I mean, in the Raspberry Pi embedded in the car.
Let’s start by formatting the SD card and installing a fresh version of the latest Raspberry operating system Raspian Buster.
For instance, this was one place in which the DonkeyCar documentation was rather shallow, so I will try to be a bit more specific so you don’t have to waste time.
First download the Raspian operating system.
Alternatively, you can get the Raspian operating system at the official RoboCar Store. At the end of this post, in the lessons learnt section, you will see that I made the mistake of not using the RoboCar version of the Raspberry Pi, as a result, I could never use the benefits of the Donkey car mobile app.
Once you download the file, then extract it and you will have a .img file.
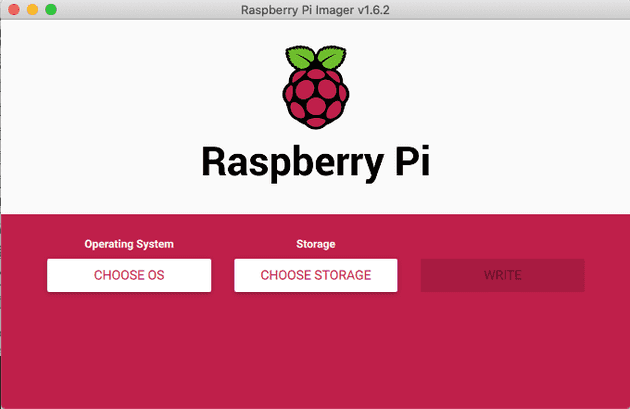
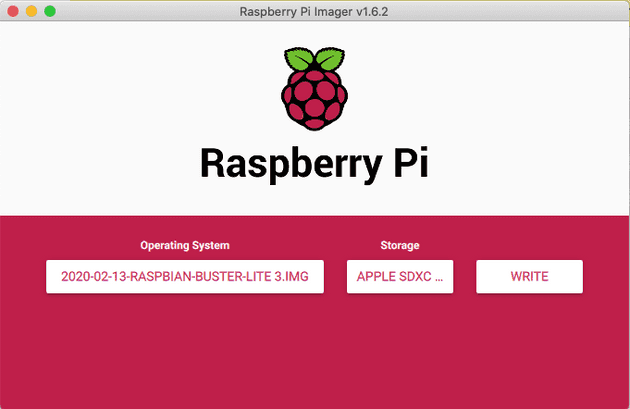
Now download the software Raspberry Pi Imager, once you open it, it will look like this.
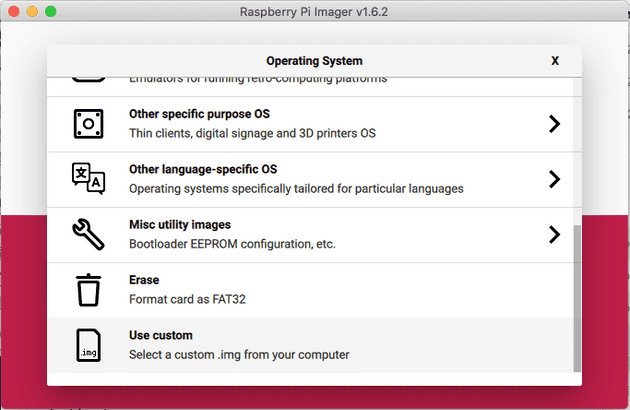
Then, you first have to click to choose the OS that you have just downloaded, then you scroll down until the last option of the menu called Use custom.
Click and select the img that you have just unzipped.
Next, you just press the WRITE button.
If this is not the first time that you are formatting the SD card it might ask you if you would like to edit the image customization settings saved previously, it’s a good idea to press edit settings because you will have the opportunity to change the name of the Raspberry or to enable SSH and configure your WIFI details. You can always change it later on, but in this way, you will save time.
This is how I set up mine.
When you are done just press the WRITE button again.
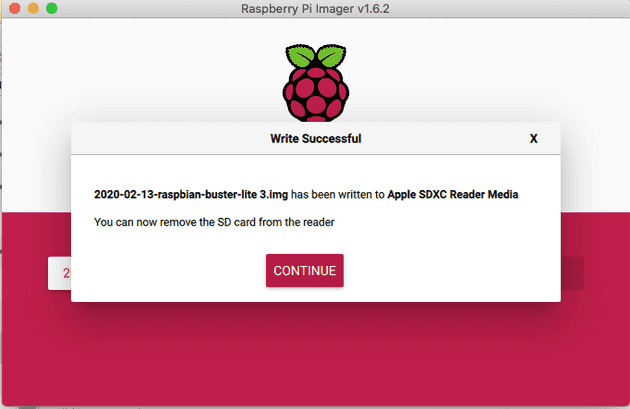
If everything went okay you should see now something like this.
Now let’s insert your SD card in your Raspberry Pi and start the car, in this first run, I will connect the Raspberry to a monitor, just to double-check that the WIFI settings are correct and the SSH is enabled.
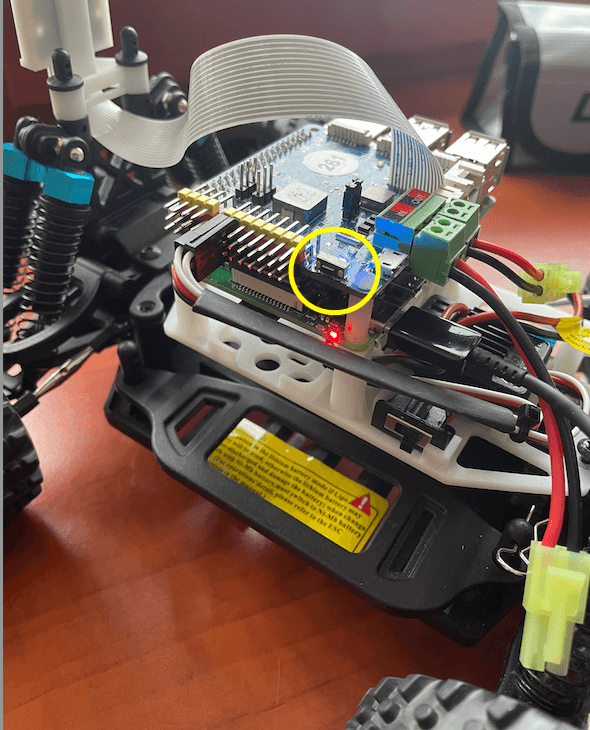
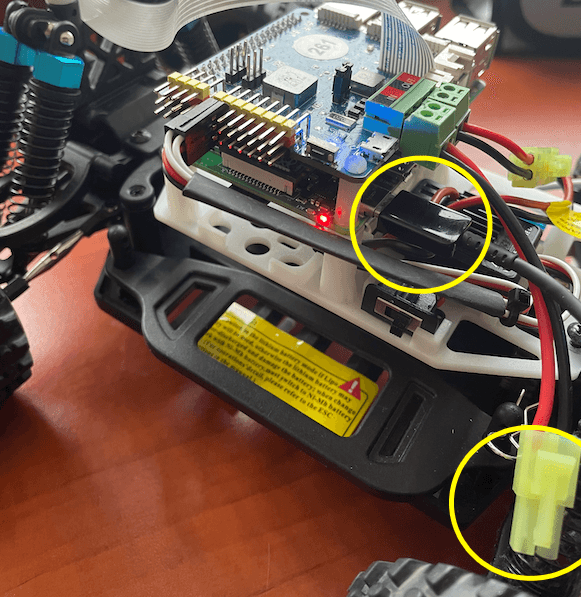
After connecting the battery, to turn on the car, don’t forget to press the button to power the car. For some reason, I always forget this.
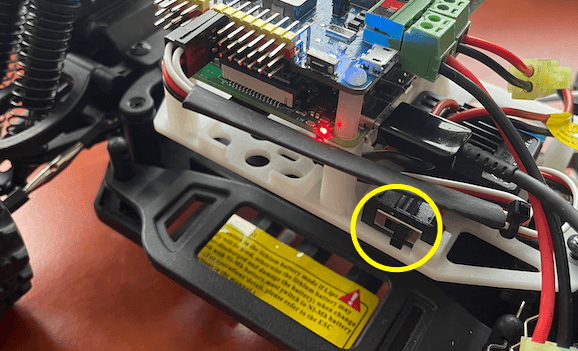
I’m not sure what this switcher below is for because for me it works in both positions, I will keep investigating.
By the way, Donkey Car chassis holds:
- Raspberry Pi 4
- One motor that spins in both ways powers the 4 wheels to move the car forward and backwards
- One servomotor that powers the steering angle of the two front wheels moving the car to the left or the right
- One microcontroller is attached to the Raspberry Pi to control the motors
- One Raspberry Pi Camera Module V2-8 Megapixel, 1080p
- Battery
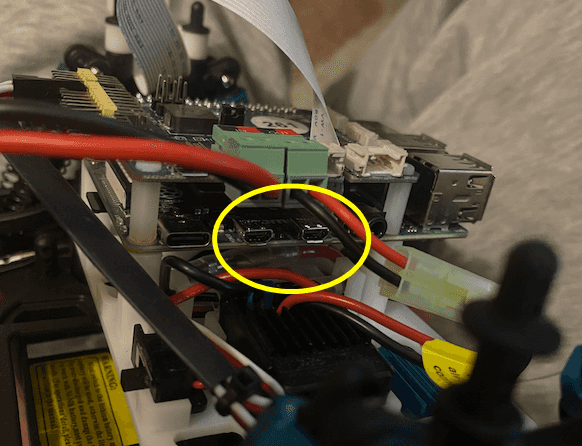
Notice how you can use a USB-C cable to power the Raspberry Pi, like in the photo below, this will save you time charging batteries, however, this is only good for when you just needs to interact with the code because it won’t power the motor and servomotor.
The Raspberry Pi comes with two mini HDMI ports that you can use to connect to a monitor.
Therefore, you will need an HDMI cable and a mini HDMI adaptor.
After first installing Raspian, unless you set up something different the default Raspbian login credentials are:
Default Username
pi Default Password
raspberry If you managed to log in to your Raspberry Pi you should see something like this:
Now let’s check if the WIFI and SSH are all good.
When you log in you are directed automatically to your user directory, which in that case it the folder called “/pi”. Navigate to the Linux root directory.
cd ../..Go to the etc/wpa_supplicant folder
cd etc/wpa_supplicant and then enter the command to open the file in nano editor and check it out.
sudo nano wpa_supplicant.confIf the file is empty, then it means that you will have to add your wifi configuration there.
Paste and edit this content to match your wifi, adjust as needed.
country=ET
ctrl_interface=DIR=/var/run/wpa_supplicant GROUP=netdev
update_config=1

network={
    ssid="Telia-9EF5D2"
    psk="LACRAIAVENENOSA"
}

network={
     ssid="ut-public"
     key_mgmt=NONE
}
You can add as many wifi networks as you would like, you could also add a priority number determining which one would try to connect first. Notice that the ut-public, from the Delta centre in Tartu, does not require entering a password.
Save the file.
It’s important to notice that with some rare exceptions (such as the ut-public from the University of Tartu), the public WIFI networks won’t let you SSH into the Raspberry pi from your computer, so this won’t be possible to do over the Eduroam for example unless you have your own router attached to the network, then you just have to connect both devices to the same router or same network.
Now let’s check if the SSH is enabled.
From the command line enter the command
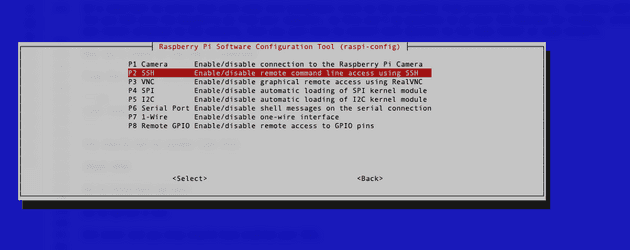
sudo raspi-configYou should see a window like this
Go to Interface options
Go to SSH option, and then hit enter and you know should have enabled your SSH.
But to use SSH connection you first will have to reboot the system.
sudo rebootNow let’s try to connect to the Raspberry via ssh.
Back to your Macbook terminal and enter
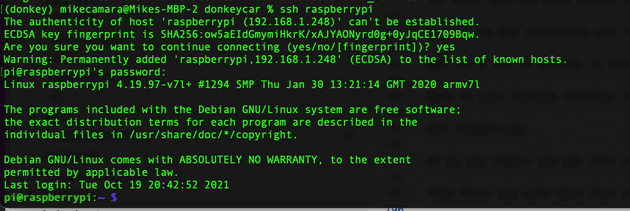
ssh raspberrypior
ssh pi@raspberrypi.localNotice that if you have not set the name of your Raspberry Pi, or set to a different name, you can always SSH into it using the pi IP address
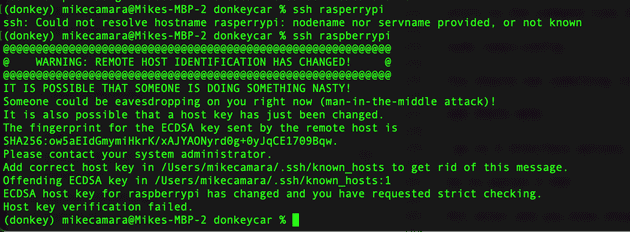
ssh pi@<your pi ip address>If by any chance you get this error in regards to the authentication
Then first you will have this other command
ssh-keygen -R raspberrypiType yes and hit enter
Try to ssh into the raspberry again
now it should have worked fine and you see your raspberry command line.
Save the Raspberry Pi IP address
It’s a good idea to check the Raspberry Pi IP address while you are still connected to the monitor. The easiest way to check your IP address is to enter the following command in the pi terminal
hostname -IIt will print the IP address in the terminal
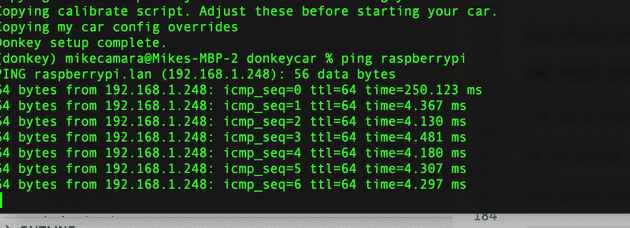
If don’t have a monitor, another way to get the IP address is to ping the Raspberry Pi
ping raspberrypiYou can also check the board IP address using the free app Net Analyzer. It is available on iOS and Android. Just make sure you connect your phone to the same wifi network as the Donkey Car.
You should be able to now disconnect the DonkeyCar from the monitor and keyboard, you won’t need them anymore as from now on you can connect to the car using SSH.
Another command that is good to know is that once you are connected to your Raspberry pi via SSH, to disconnect you can type.
exitInstalling DonkeyCar in the Raspberry Pi
Update and Upgrade
The donkey car docs recommend we use the following two commands to update the package manager of the Raspberry Pi.
sudo apt-get update
sudo apt-get upgrade
However, these didn’t fully work for me, instead, I had to use slightly different commands below.
To make sure the installation would run smoothly clean the cache
sudo apt-get clean Then enter
sudo apt update
sudo apt full-upgrade
Make sure you install git
sudo apt install gitUpdate Raspberry configuration file
sudo raspi-configEnable Interfacing Options - I2C
Enable Interfacing Options - Camera
Select Advanced Options - Expand Filesystem so you can use your whole sd-card storage
Choose
Note: Reboot after changing these settings. Should happen if you select yes.
Install Dependencies
Make sure your raspberry pi has Python 3.7 or higher installed
To check just enter
python --versionIf you see version 2.7..
Then type
python3 --versionIf you see the 3.7 there then just need to type the following
alias python=python3Now python —version command will give you the latest version.
Continue installing dependencies
sudo apt-get install build-essential python3 python3-dev python3-pip python3-virtualenv python3-numpy python3-picamera python3-pandas python3-rpi.gpio i2c-tools avahi-utils joystick libopenjp2-7-dev libtiff5-dev gfortran libatlas-base-dev libopenblas-dev libhdf5-serial-dev libgeos-dev git ntpOptionally, install OpenCV Dependencies. If you are going for a minimal install, you can get by without these. But it can be handy to have OpenCV.
sudo apt-get install libilmbase-dev libopenexr-dev libgstreamer1.0-dev libjasper-dev libwebp-dev libatlas-base-dev libavcodec-dev libavformat-dev libswscale-dev libqtgui4 libqt4-testSetup the virtual environment, notice that this needs to be done only once
python3 -m virtualenv -p python3 env --system-site-packagesecho "source env/bin/activate" >> ~/.bashrcsource ~/.bashrcYour terminal should look like this now:
Modifying your .bashrc in this way will automatically enable this environment each time you log in. To return to the system python you can enter
deactivateGet the latest Donkeycar from Github.
git clone https://github.com/autorope/donkeycarcd donkeycargit checkout masterpip install -e .[pi]pip install numpy --upgradecurl -sc /tmp/cookie "https://drive.google.com/uc?export=download&id=1DCfoSwlsdX9X4E3pLClE1z0fvw8tFESP" > /dev/nullCODE="$(awk '/_warning_/ {print $NF}' /tmp/cookie)"curl -Lb /tmp/cookie "https://drive.google.com/uc?export=download&confirm=${CODE}&id=1DCfoSwlsdX9X4E3pLClE1z0fvw8tFESP" -o tensorflow-2.2.0-cp37-cp37m-linux_armv7l.whlpip install tensorflow-2.2.0-cp37-cp37m-linux_armv7l.whlYou can validate your tensorflow install with
python -c "import tensorflow"If you don’t see anything after the last command then it means it is all working.
Install OpenCV
If you’ve opted to install the OpenCV dependencies earlier, you can install Python OpenCV bindings now with the command
sudo apt install python3-opencvCheck if everything went okay
python -c "import cv2"And if no errors, you have OpenCV installed.
Optionally you can install Donkey Car Console. Donkey Car console is a management software of the donkey car that provides rest-based API to support Donkey Car mobile app. This software currently supports RPI 4B only.
Download the project
git clone https://github.com/robocarstore/donkeycar-consolesudo mv donkeycar-console /optcd /opt/donkeycar-consoleInstall dependencies
pip install -r requirements/production.txtRun the init script to set up the database
python manage.py migrateTest the server if it is running properly
python manage.py runserver 0.0.0.0:8000Go to http://your_pi_ip:8000/vehicle/status. If it returns something without error, it works.
Install the server as a service
sudo ln -s gunicorn.service /etc/systemd/system/gunicorn.serviceCreate Donkeycar from Template
Create a set of files to control your Donkey with this command:
donkey createcar --path ~/mycarConfigure options. Look at myconfig.py in your newly created directory, ~/mycar
cd ~/mycar
sudo nano myconfig.py
Each line has a comment mark. The commented text shows the default value. When you want to make an edit to over-write the default, uncomment the line by removing the # and any spaces before the first character of the option.
Example:
#STEERING_LEFT_PWM = 460becomes:
STEERING_LEFT_PWM = 500This part can get be super daunting and it is crucial to make the car work, especially, with enabling the correct ports, IMU, etc, what work the best for me was to copy all the initial setup from the Leo’s DonkeyZoo project and the car will just work fine.
Also, important to notice that there is two config files, the config.py and the myconfig.py, and you will have to change both. So, these files have the same commands, and the myconfig.py is where you should make the changes, as every change you make in myconfig.py will overwrite the same command in config.py, the difference is that if you update the repository the config.py files are refactored to the original settings but the myconfig.py will remain as you set up. So it’s recommended to only set up the myconfig.py, but regardless, I had to change the config.py to make it work.
Joystick setup
If you plan to use a Bluetooth joystick, it can become very hard and time-consuming if you try to follow the DonkeyCar documentation, so don’t waste your time and follow this blog post instead
The only different step I took from the tutorial above, was that when they tell you to get the controller MAC address by using the command “scan on”, it didn’t quite work for me because I could see every Bluetooth device in my entire neighbourhood, so it was impossible to discern which one belonged to the Raspberry Pi, what worked for me was instead of using the “scan on” command, when using the bluetoothctl to pair, after the “agent on” command I would enter the command “devices”, and plug the controller via USB cable, that would give me the PS3 controller MAC address.
Setting up the tracks
Theoretically, you wouldn’t need to use a track, or tapes to train your car to drive well autonomously, for instance, some of my peer engineers at the University of Tartu have successfully trained the car to drive around Delta Center rooms, without marking the floor, in that case, the walls became the reference point. And yet another group managed to train the car using outdoors tracks created by the nature.
However, using a distinct colour type tape on the floor is one reliable way to train your CNN.
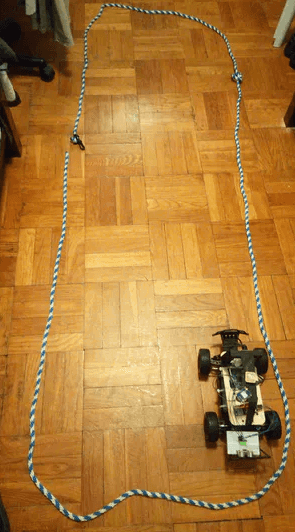
It does not need to be tape, it could be a long rope or a hose, I’ve seen people using A4 paper sheets on the floor, or even some card box or wooden walls. The path just needs to be large enough so the car can turn smoothly, mainly in the curves.
Below are some track examples.
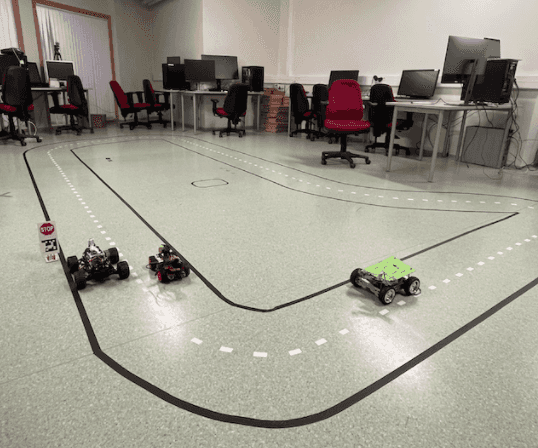
The track that I built at Taltech AI Lab
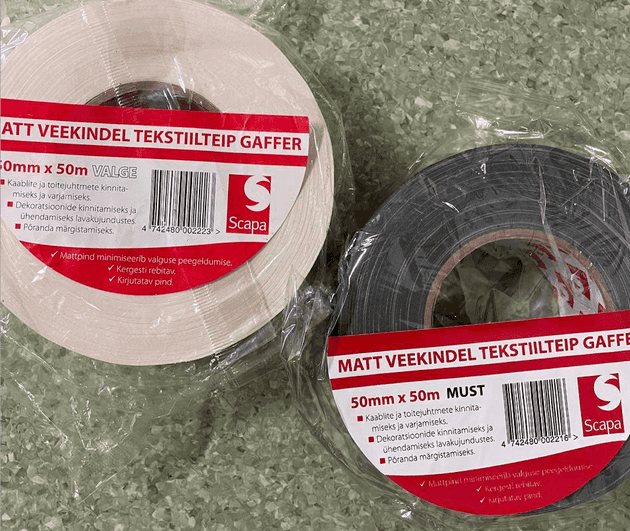
My Taltech professor Juhan Ernits recommended the use of a specific type of tape, called Gaffer, in that way I wouldn’t ruin the floors of the Taltech AI lab, this type of tape is really good because, they stick very well to the floor or walls, but they are also very easy to remove without leaving glue marks around. I’ve been using them to build different track shapes around my house.
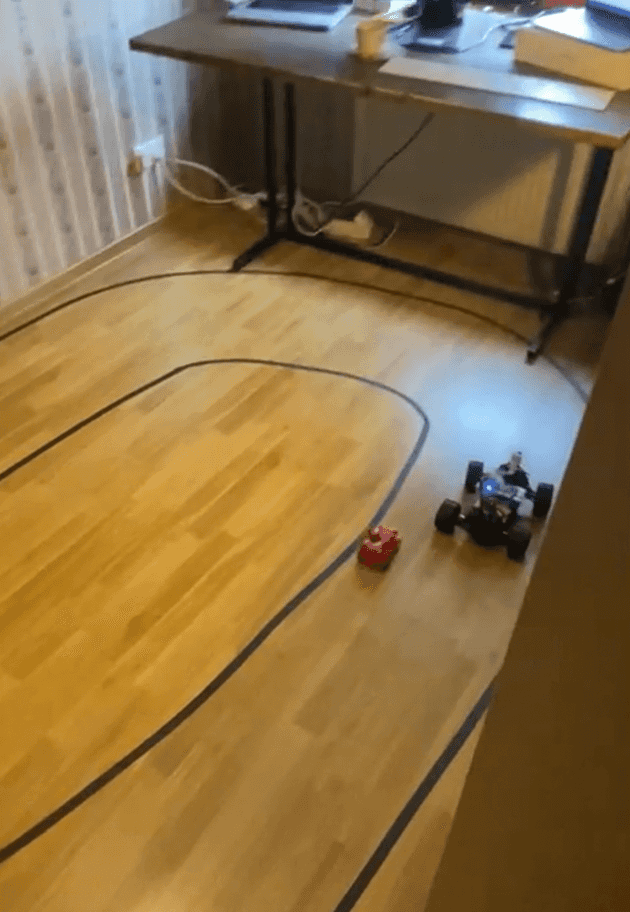
Track in my office room
Other tracks I’ve seen people building
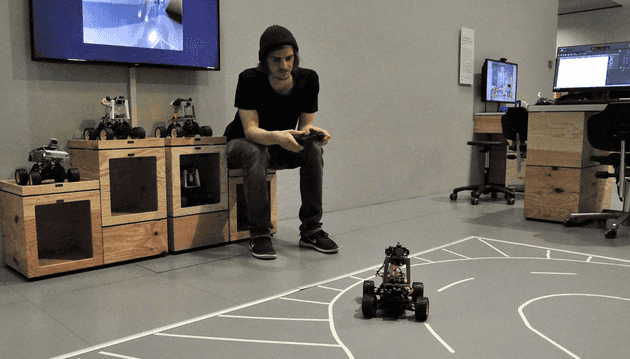
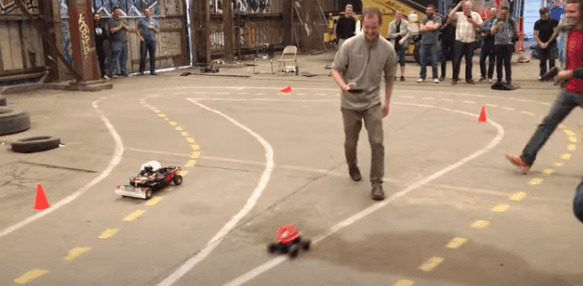 Source - Notice that here you see the man himself, William Roscoe, running after his DonkeyCar.
Training your model
Type the following command to start driving your car and create data for the training.
cd ~/mycar
python manage.py drive
Or if you would like to drive using the Joystick instead
cd ~/mycar
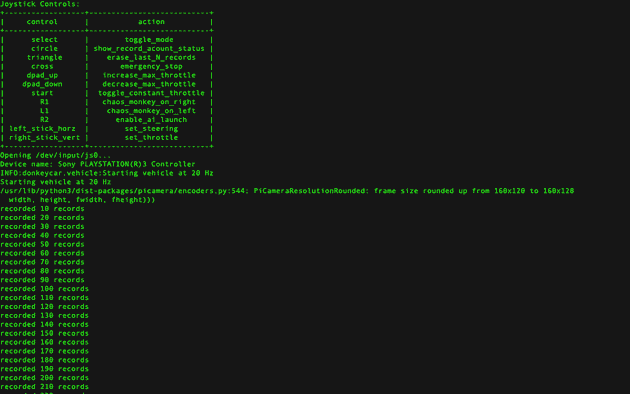
python manage.py drive --js
Training a model means to drive your car, in other words, train your “car” how to drive in that environment, the technique is called imitation learning, as the neural network will imitate the human behaviour.
So you will be driving around the track and commands will be recorded on the server.
I would recommend you to drive at least 25k frames, because every time I tried to train the car with only 10k, the car performed poorly, however, after 25k frames recorded the car performed remarkably well.
When you finished recording the training data you will need to transfer data from your car to your computer.
In a new terminal session on your host PC use rsync to copy your cars folder from the Raspberry Pi.
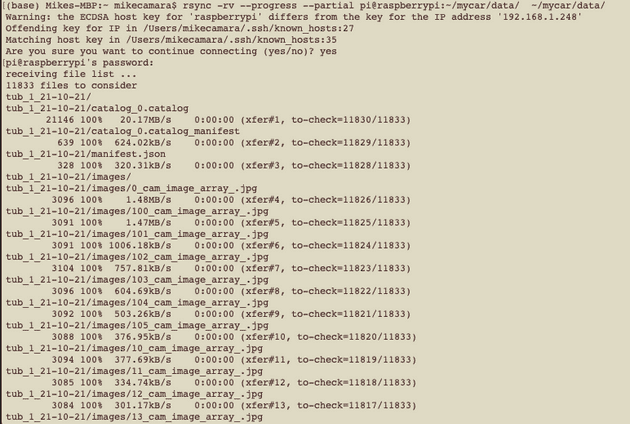
rsync -rv --progress --partial pi@<your_pi_ip_address>:~/mycar/data/ ~/mycar/data/In my case, I could just type
rsync -rv --progress --partial pi@raspberrypi:~/mycar/data/ ~/mycar/data/If successful you will see something like this in your terminal.
And then in your computer, inside the folder mycar/data/ you will have a folder called tub_date_and_time with all the data.
With the data in the computer you will add the command to train your neural network, just make sure you point to the correct folder.
If you are currently inside the mycar folder then type:
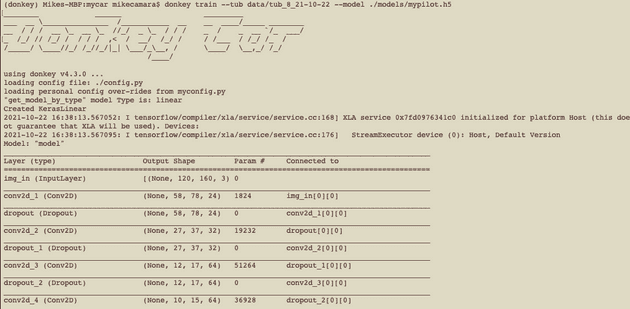
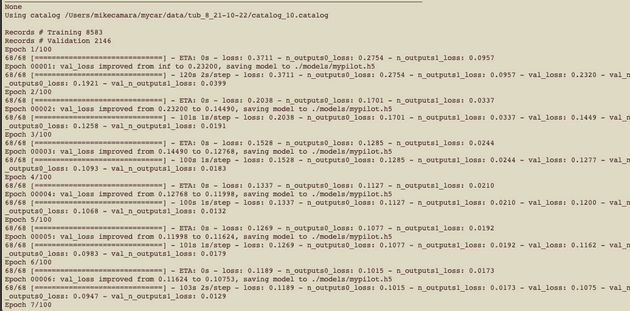
donkey train --tub data/tub_8_21-10-22 --model ./models/mypilot.h5In the command above you have the function train, the input data and the output file that you will get when the training is finished.
If everything is okay will see something like this in your terminal
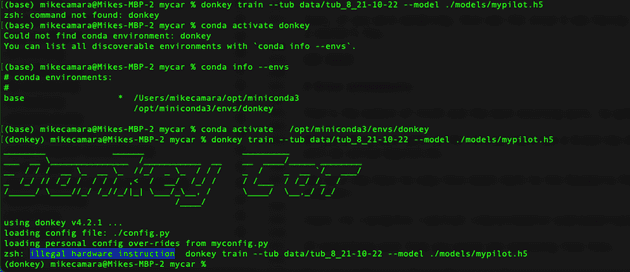
Just a quick note that I could never run this last command above in my Macbook M1 ship, I think there are some compatibility issues.
I could get around by running the command in my old Macbook, but regardless, you could always run the training algorithm using Google Colab tool, which would be faster as well.
Just, if you were wondering, this was the issue I was having with the Macbook M1 ship, some sort of illegal hardware instruction, which I couldn’t fix.
Drive autonomously
That’s the moment of truth and the most exciting part, to get your car self-driving.
If everything went well so far you have now a brand new model ready to drive your car. It will be inside the folder models and it will be called mypilot.h5.
You will now have to transfer this model back to the Raspberry Pi, so make sure your car is on and type the following command in your computer:
rsync -rv --progress --partial ~/mycar/models/ pi@raspberrypi:~/mycar/models/If everything went fine you would see something like this.
Wow, done! You are almost there, so close.
There is one last step to take now which is to run the model in the car.
So, from your raspberry console type:
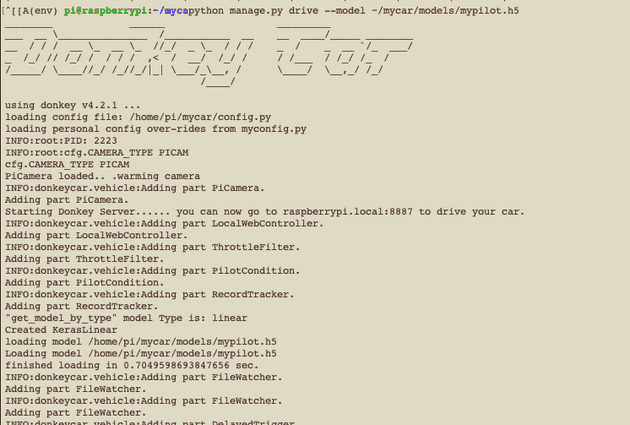
python manage.py drive --model ~/mycar/models/mypilot.h5In the terminal, you will see something like this
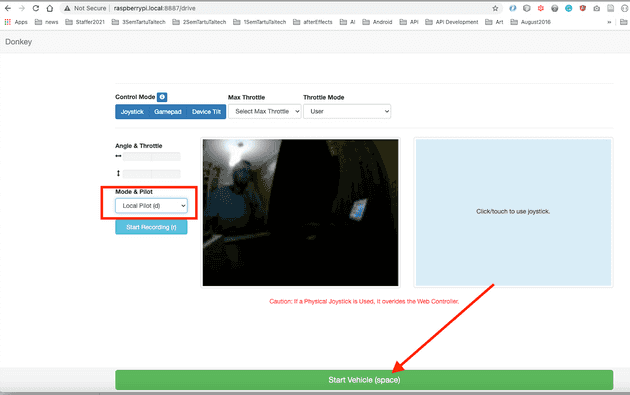
Now, the very last step. Go to a computer browser, type “raspberrypi:8887” to open the web-app interface, and then make sure that the Mode & Pilot selected is Local Pilot (d) and press the green button to start the vehicle.
Voilà!
Your car should be driving autonomously now.
How was it? Are you happy with the performance of the car?
Or is the car crashing around and not performing as you expected?
No problems. We can improve that!
Let’s take a look at the next section about driving better.
Driving better
There are two important aspects to observe if would like your autonomous car to drive better.
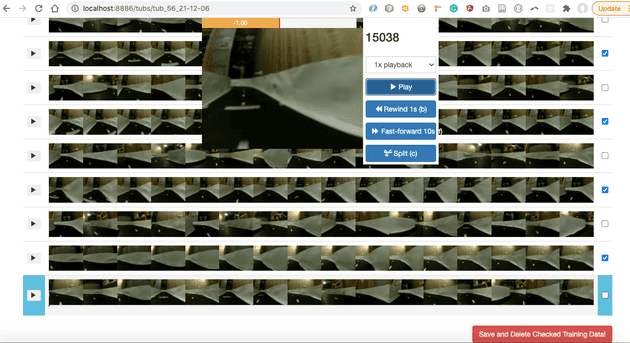
First is the way you train your car, in terms of how good can you drive your car. Here is where is the famous saying “garbage in, garbage out” comes into place. If you train your car hitting walls, or derailing from the track, then your car will learn to do these bad things. So, you should make sure you clean the data carefully, by only exposing the model for the good pilot that you are. Make sure to delete all random garbage images from the dataset. You can use the donkey UI tools for that. You can clean the data by using the web-app provided interface, or by clicking the triangle button of the joystick every time you crash, so it would erase the latest frames.
Secondly, is related to how the machine learning model is trained. The DonkeyCar platform provides you with multiple different ML architectures that you could use to train your model. Or if you are ML savvy you could even create your architecture.
Finally, don’t forget to collect enough data, it can be tedious to keep driving your car around, however, I’ve experienced that the car will need at least 20k frames to start to perform acceptably.
One of the most active collaborators of the DonkeyProject is Tawn Kramer, he created an open-source simulation environment that can be used to train reinforcement learning models.
In this video he provides tips on how to drive and steer your vehicle for better training.
But from my experience and from what I’ve heard from my peer engineers was that to train your model well you would have to see where it fails, collect more data of those turns and retrain the model with a bigger dataset containing additional data.
Furthermore, if you have trained your car in your track and then would like to train it in a different place, mixing the data can be difficult and could lead to bad results.
Videos of my car driving autonomously
Video of my auto-pilot trained with 25k frames
With enough data the car performance was acceptable.
Video of my auto-pilot trained with less data 10k frames
Not enough data results in poor self-driving performance.
Video of my auto-pilot failing miserably
In the Delta track, my mistake was to train the model with too little data and I also tried to train the car to drive into random intersections, while I should have driven it in rounded loops only.
Lessons Learnt
In the following video I demonstrated how using the KerasLinear pilot to train the car it would drive for 14 laps during over 4 minutes in a circuit I built in my home office.
The network was trained with around 24.000 images, and I had also activated the IMU of the vehicle.
However, what I think contributed the most was training the network with cleaned supervised data. Interesting to notice that I didn’t apply any special driving style as recommended here, in fact, I just drove not so fast, avoiding collision and trying to keep the vehicle in the centre of the lane.
Training the car to drive in the centre of the lane proved to be a challenging task, using the joystick I measured that I would have for every 1000 images an average of two collisions with the wall, so exploring the tools that are available with the Donkeycar package was very helpful.
The available commands are:
['createcar', 'findcar', 'calibrate', 'tubclean', 'tubplot', 'makemovie', 'createjs', 'cnnactivations', 'update', 'train', 'ui']The most useful was tubclean to remove all the crashes and bad driving examples from training data. It can be overwhelming to sit and watch carefully all your data to clean the bad parts but it really pays off and helps to generate a good model at the end.
You can run this command from the Raspberry Pi or from your computer, but if you do in your local computer, and then sync the Raspberry again in the future, then your changes and data cleaned will be erased, and you will have the old uncleaned data. So, perhaps is a good idea to remove the tub file from the Raspberry after syncing with your computer.
In my case I use:
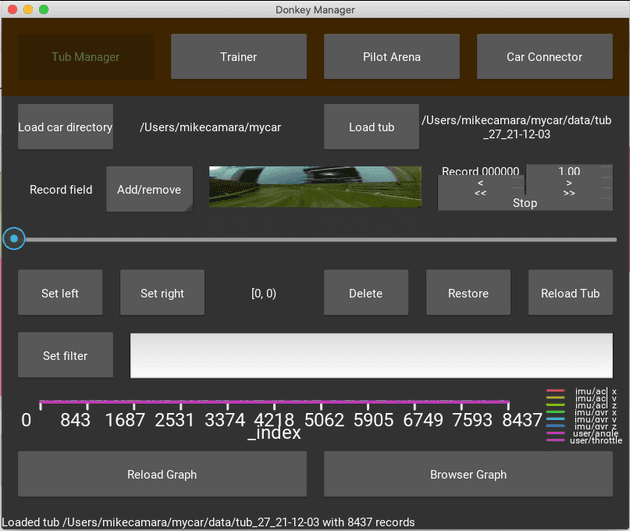
donkey tubclean dataAnother excellent feature is the donkey ui. It gives you this awesome interface that can help you to explore your data and learn from the patterns displayed in the plots related to the steering, throttle, steering angle and IMU.
I spent a lot of time analysing the IMU data, I was under the impression that I could use the IMU alone to recreate a plot with the trajectory and directions travelled by the vehicle.
However, to enable the IMU in the Donkeycar wasn’t so straightforward, first I had in myconfig.py enable these three settings:
HAVE_IMU = True
IMU_SENSOR = 'mpu9250'
IMU_DLP_CONFIG = 2
Besides that, I also had to modify the file donkeycar/parts/imu.py replacing the following two lines to make it work:
# address_ak=AK8963_ADDRESS,
# address_mpu_master=addr,  # In 0x68 Address
address_ak=0x69,
address_mpu_master=0x69,
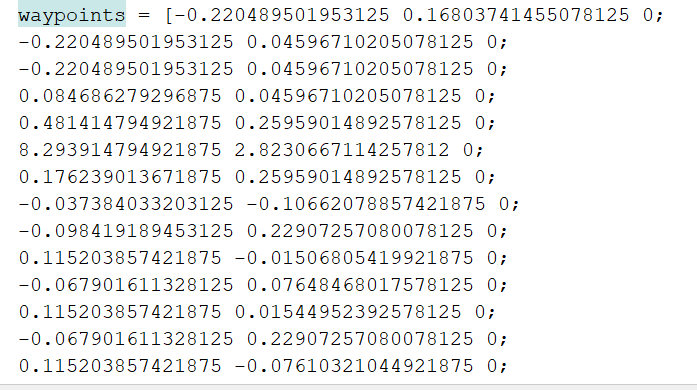
After that, I could explore all the graphs generated by Donkey. I created a script in python to extract all the waypoints from the IMU and export them to CSV so I could plot the trajectory using Matlab.
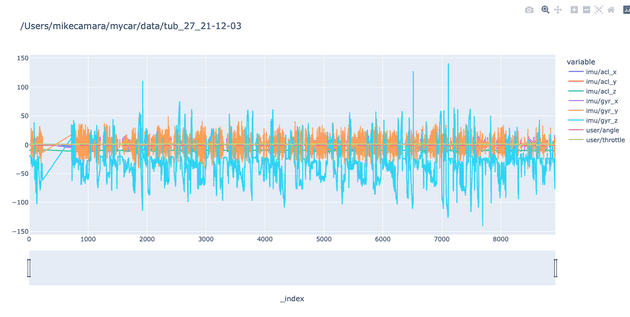
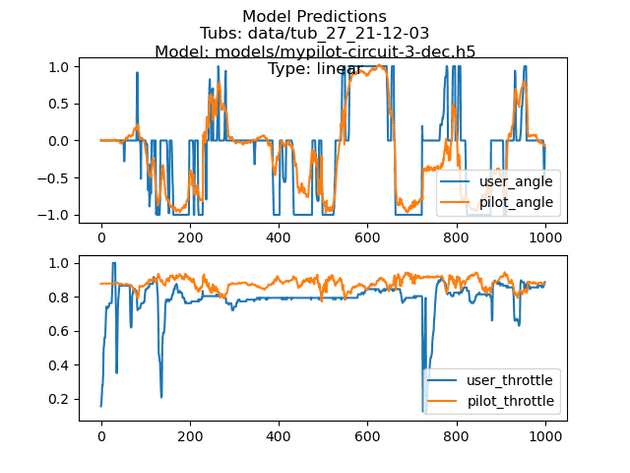
Plots generated with donkey tubplot command. For instance, I use:
donkey tubplot --tub=data/tub_27_21-12-03 --model=models/mypilot-circuit-3-dec.h5 --type=linearTo generate this plot.
The IMU generated graphs, in the end, weren’t so useful, my initial intention was to use them to calculate the path deviation from the training set.
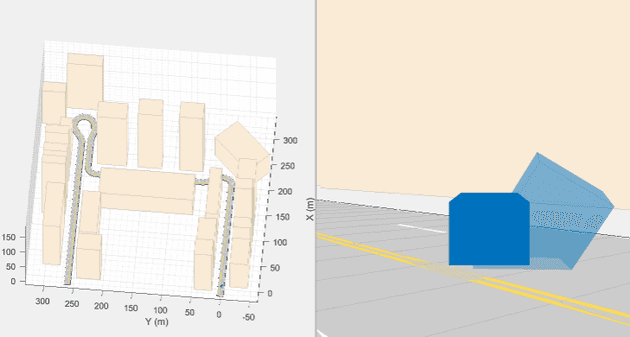
Using the waypoints generated by the IMU I could plot all sorts of graphs using Matlab, but nothing looked like the shape of the circuit track, so more research has to be done in this area. Below are some examples of plots I could generate using the IMU waypoints and Matlab.
Another useful tool available with the Donkey libraries is the makemovie tool. Besides generating a cool video from the front camera of the vehicle performing in the circuit it also generates the ground truth comparison with the model prediction.
Again, to make this feature work wasn’t so easy, and I had to add additional libraries not mentioned by the Donkey docs and in my case, I could only make it work from the Raspberry Pi, but not from the computer. These were the extra libraries that I had to install in the Pi.
pip install moviepy
sudo apt install ffmpeg
pip install git+https://github.com/autorope/keras-vis.git
And then to generate the video I would use the commands:
donkey makemovie --tub=data/tub_27_21-12-03or
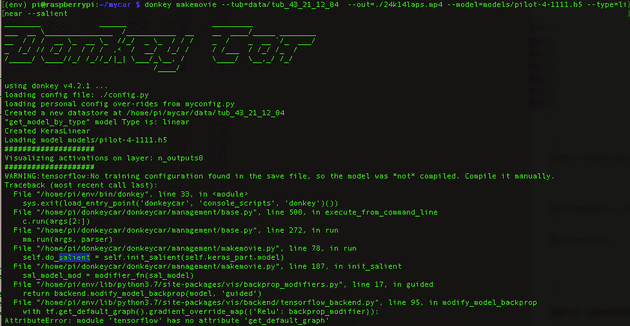
donkey makemovie --tub=data/tub_27_21-12-03 --out=./outputVideo_1.mp4 --model=models/mypilot-circuit-3-dec.h5 --type=linear There is yet another optional feature included in the makemovie called --salient, which should overlay a salient map showing the neural network activations. The command would be the following:
donkey makemovie --tub=data/tub_43_21_12_04 --out=./24k14laps.mp4 --config=myconfig.py --model=models/pilot-4-1111.h5 --type=linear --salientHowever, it never worked for me, this was the error that I kept getting both in the computer and on the Raspberry.
When I checked on Google and on the Donkey Discord group I noticed that more people had the same issue and it seems to be related to the update in the TensorFlow libraries. But I couldn’t find a solution to this issue.
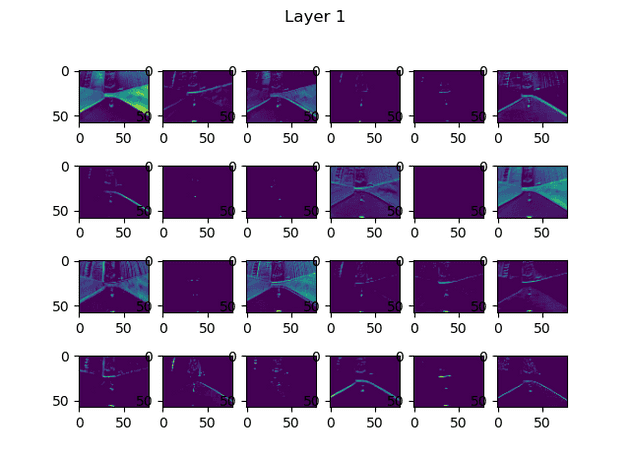
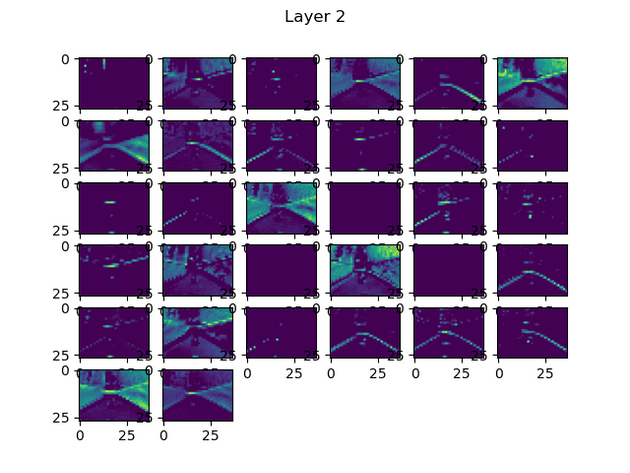
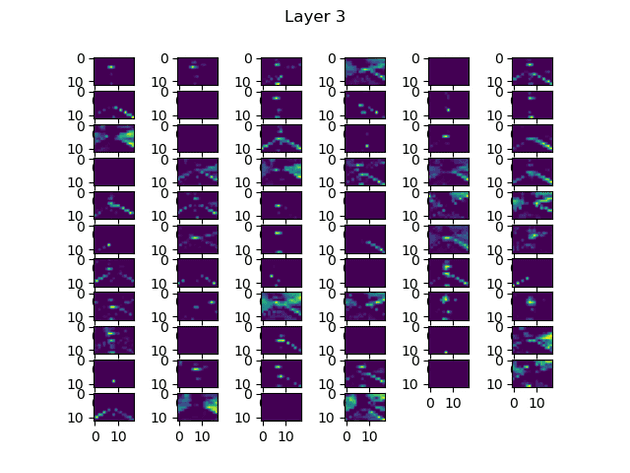
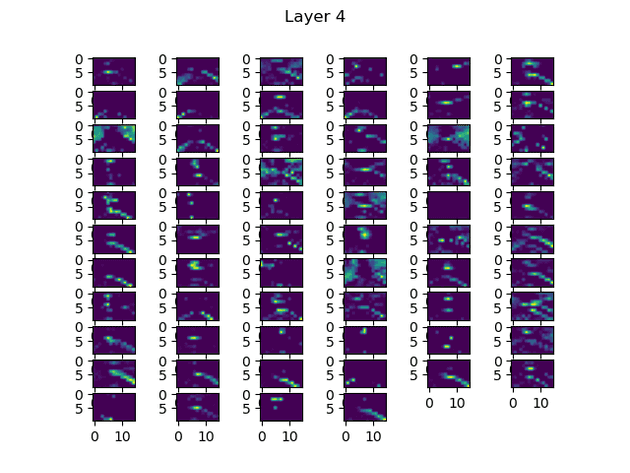
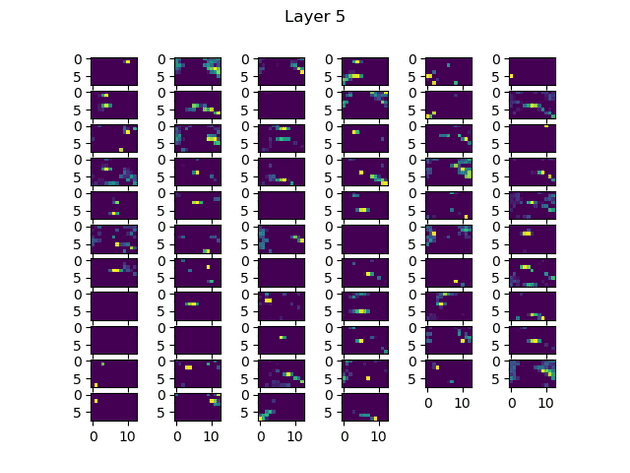
Alternatively, Donkey has another powerful tool that also highlights the convolutional neural network (CNN) activations. Since I couldn’t get the —salient overlays to work, using this tool to analyse the data became crucial for understanding why my car was failing and it was triggering the network the most.
To use the feature you could use:
donkey cnnactivations --model models/mypilot-circuit-3-dec.h5 --image data/tub_27_21-12-03/images/2982_cam_image_array_.jpgor
donkey cnnactivations --model models/pilot-4-1111.h5 --image data/tub_43_21_12_04/images/9896_cam_image_array_.jpgThis will open images for each Conv2d layer in the model.
To sum up, it has been a lot of fun, and I’ve learnt much more about Machine Learning than I was expecting. There was a lot of trial and error, a lot of bad results to finally start to get some decent results.
The main lesson is to use good quality data, so make sure you clean any crashes or bad driving from the dataset. Also, if the car still performs poorly in some difficult curves or other parts of the track then you can collect more good data of those parts and retrain the model. To train the model with more than one tub, you separate the tubs with commas, like this:
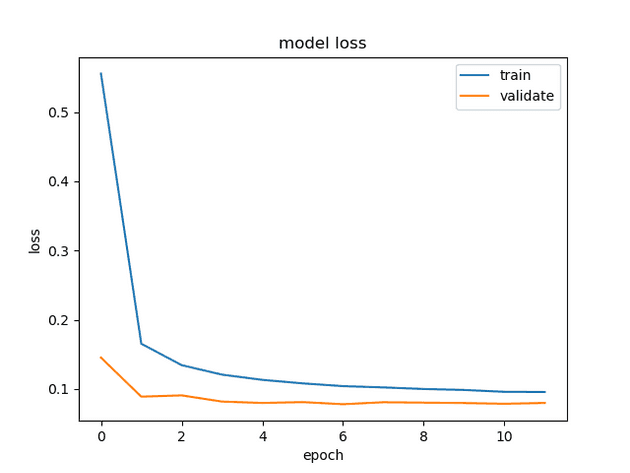
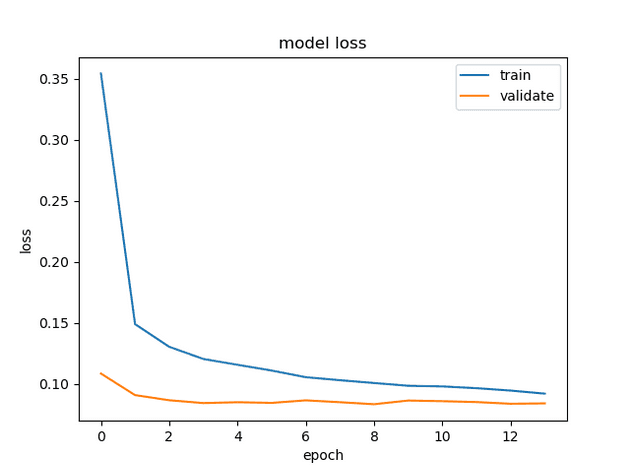
donkey train --tub data/tub_56_21-12-06,data/tub_71_21-12-07 --model ./models/pilot56with71.h5The model loss graphs from my most successful models have shown that the models only need 10 or 12 epochs to create a good pilot, again another proof that you don’t need a lot of data to generate a good model, but you will need to be as precise as possible.
At a late stage of the project, I realized that I couldn’t get the DonkeyCar app to work, neither Android nor iOS, which is not essential but I couldn’t easily see the battery level or use the phone as a controller. I realized that the issue was that I should have instead downloaded and flashed the latest Raspberry Pi image from the Robo Car Store official repository to reset my car. More information about the Donkey car app here.
One last tip is to pay attention to the tracks you create. I have wasted a lot of time building bad tracks, and it would delay the entire project progress. For instance, some of the mistakes I’ve made:
Track 1
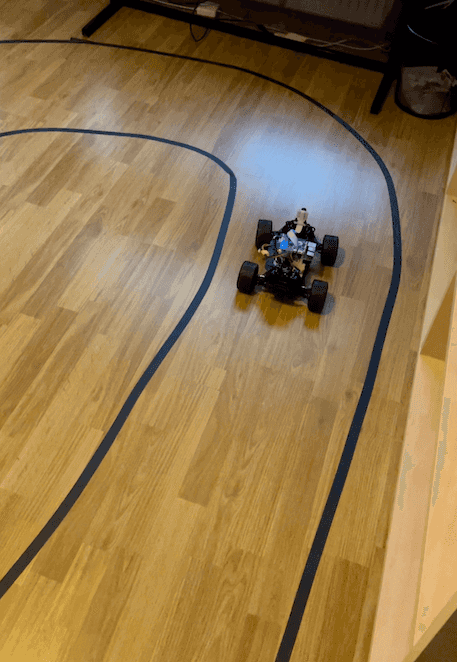
TalTech AI lab
The track was too narrow and the curves proved to be impossible to handle by the limits of the car steering angle. The Eduroam WIFI connection also didn’t allow me to connect the computer to the Raspberry Pi.
Track 2
The circular track at the home office
After analyzing the CNN activation images I noticed that the black tape colour wasn’t a good choice in this type of floor. It was still too small, and because I only had to turn in one direction, the training data ended up quite sloppy the car didn’t perform really nice.
Track 3
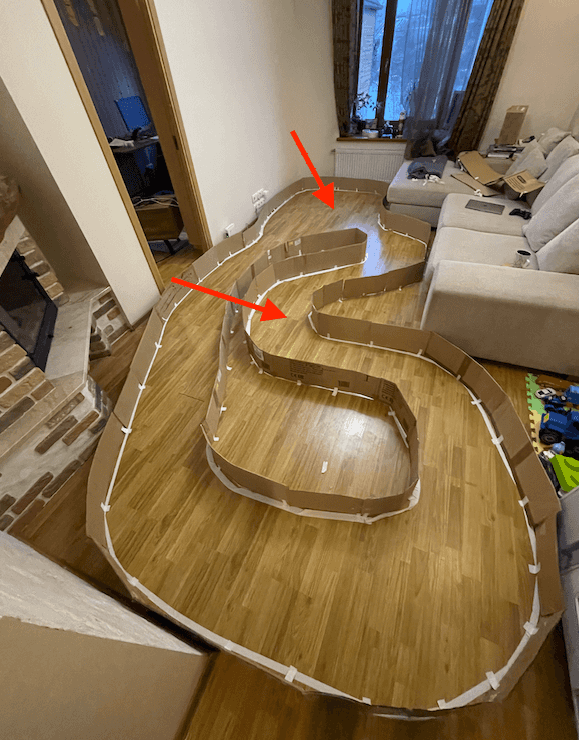
Circuit track in my living room
My next track was more ambitious and had turns to both left and right, however, again some curves were just too narrow for the car to handle and I had to adapt.
Track 4
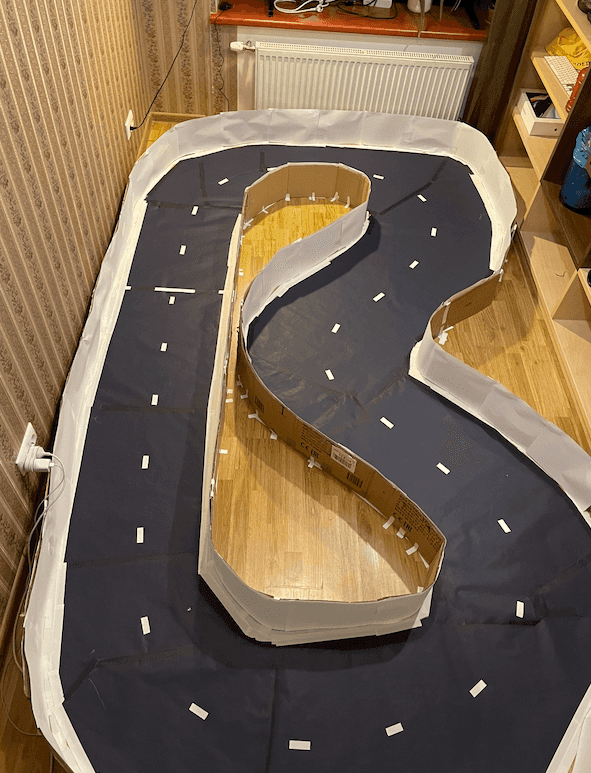
The circuit in B shape at the home office
The shape and driveability of this track were superior to all before, however, covering the floor with wrapping paper was such a mistake, the car had to use an extra throttle power to move on top of the uneven parts of the paper, which would lead the car to either stop or crash suddenly even with a good training dataset.
Track 5
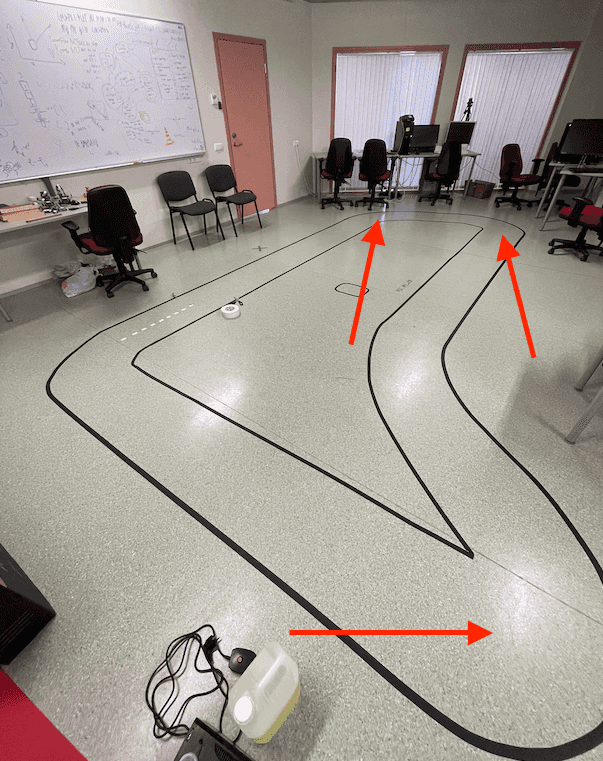
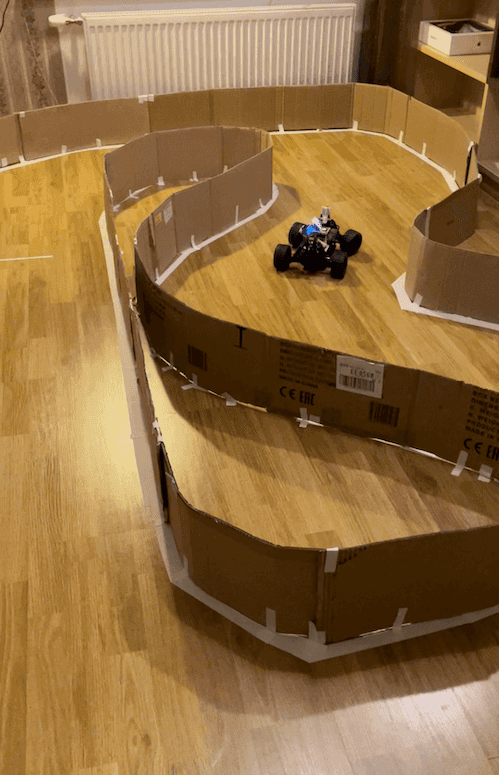
The circuit in B shape at the home office improved
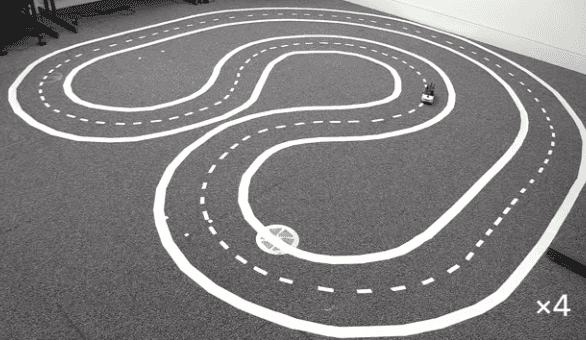
This circuit was inspired by the track built by the Cambridge university researchers in a project about autonomous driving. The advantage of this shape is that enables left and right turns without requiring much space, it also allows the curve to be nicely distributed, creating just enough space for the car to perform acceptably.
This was the track created by the Cambridge University researchers.
Future Work
Now that I managed to craft a model that can drive the circuit, my next goal is to retrain the same model but now add small static obstructions in the track such as Lego Doblo cars and blocks as I’m getting ready for the DeltaX competition. Furthermore, I intend to use the pre-trained model MobileNet V2 SSD provided by Google to implement the stop sign detection and do some experiments to try to misclassify it with evasion attacks on the machine learning model using the IBM Adversarial Robustness Toolbox.
Resources that I wish I knew before
-
Leo Schoberwalter donkey-zoo repository with optimised myconfig.py and config.py settings
-
Create a custom Neural Network Architecture for the DonkeyCar
-
Learning to Drive Smoothly in Minutes using a reinforcement learning algorithm
-
Build a Self-driving Car in Two Days and Learn about Deep Learning — Part 1
-
Donkey Car Part 3: Neural Net — Improving Accuracy and Inference Speed on Raspberry Pi
-
Autonomous toy car platform for projects and student competitions
Interesting related publications
-
DeepPicar: A Low-cost Deep Neural Network-based Autonomous Car
-
Explaining How a Deep Neural Network Trained with End-to-End Learning Steers a Car
-
Self-driving scale car trained by Deep reinforcement Learning
-
Training Neural Networks to Pilot Autonomous Scaled Vehicles
-
Optimizing Deep-Neural-Network-Driven Autonomous Race Car Using Image Scaling
